CREATING THE STRUCTURE OF BUILDING: Difference between revisions
Jump to navigation
Jump to search
(→Example of use: - dlalsze zmiany na potrzeby Case 165507) |
AWS edytor (talk | contribs) |
||
| (One intermediate revision by one other user not shown) | |||
| Line 17: | Line 17: | ||
==Description== | ==Description== | ||
{{Template:Article in progress}} | |||
==Location in the program== | ==Location in the program== | ||
| Line 46: | Line 46: | ||
<br/>{{Info}} [[View navigation in the graphical editor|View navigation in the graphical editor]] | <br/>{{Info}} [[View navigation in the graphical editor|View navigation in the graphical editor]] | ||
== | ==Additional information== | ||
It is particularly advantageous to import a base drawing in the DWG format, as it enables snapping the cursor to components located on indicated layers of the base drawing when editing the structure. | |||
It is worth noting that printed plan drawings can be scanned or photographed, and the file thus obtained can be imported. | |||
[[Category:InstalSystem 5]] | [[Category:InstalSystem 5]] | ||
[[Category:FUNCTIONALITY]] | [[Category:FUNCTIONALITY]] | ||
Latest revision as of 11:48, 26 July 2016
| Product | InstalSystem 5 |
| Type of article | FUNCTIONALITY |
| Source for translation | IS 5.0 Beta 30 |
Description
NOTE: ARTICLE IS UNDER PRODUCTION AND ITS CONTENT MAY BE TEMPORARY IN SOME EXTENT!
Location in the program
Storeys management
- Storeys management is available in window General data.
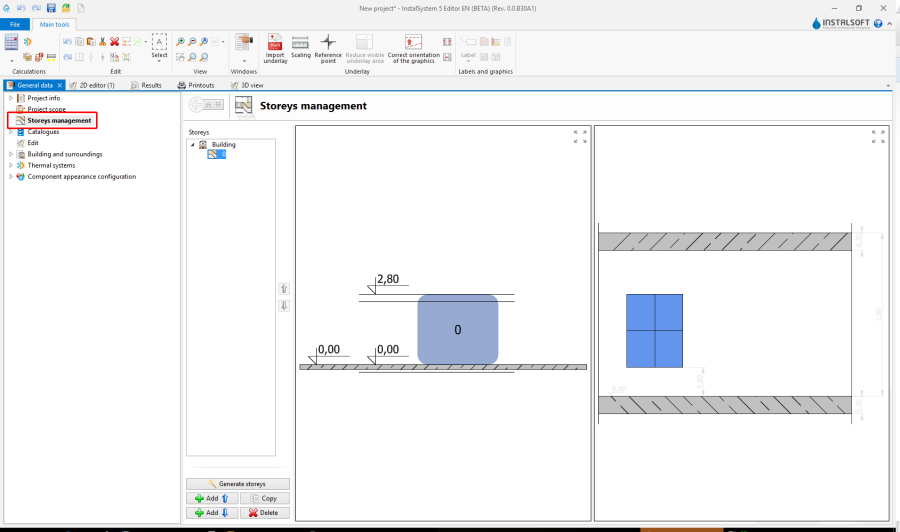
1. Storeys management

Import underlays
- Features and functionality for import underlays are available at the bar Main tools in section Underlay while the range of editing Underlay.
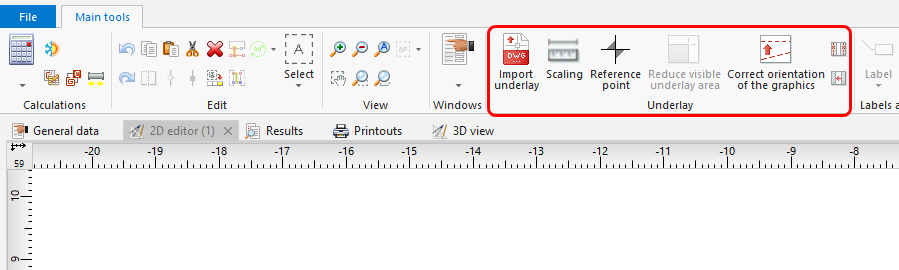
2. Import underlays

Construction
- Features and functionality for building structure are available at the bar Main tools in section Construction while the range of editing Construction.
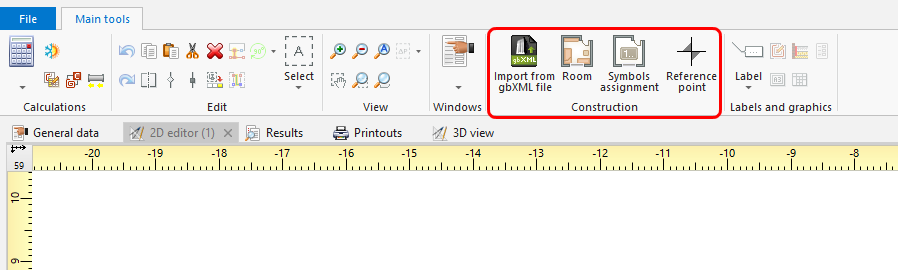
3. Construction

Example of use
Manual structure edit
- Create the required storeys and complete data.
- Import and scale the underlay.
For more information, see: [[{{{link}}}]] Import files - Insert element Reference point.
- Create Room by tracing
or by drawing a diagonal.
Import complete building structure
Import complete building structure from InstalSystem 4 (ISB) file
Verification of the correctness of building structure
Verification of the correctness of underlays
Verification of the correctness with 3D view
For more information, see: [[{{{link}}}]] View navigation in the graphical editor
Additional information
It is particularly advantageous to import a base drawing in the DWG format, as it enables snapping the cursor to components located on indicated layers of the base drawing when editing the structure. It is worth noting that printed plan drawings can be scanned or photographed, and the file thus obtained can be imported.