CREATING THE STRUCTURE OF BUILDING: Difference between revisions
(Utworzenie wersji EN na potrzeby Case 165507) |
(→Example of use: - dlalsze zmiany na potrzeby Case 165507) |
||
| Line 28: | Line 28: | ||
==Example of use== | ==Example of use== | ||
=== | ===Manual structure edit=== | ||
# Create the required storeys and complete data.<br/>{{#ev:youtube|xJ2y_RDHo4k|900||||rel=0}} <br clear="all"/> | # Create the required storeys and complete data.<br/>{{#ev:youtube|xJ2y_RDHo4k|900||||rel=0}} <br clear="all"/> | ||
# Import and scale the underlay.<br/>{{Info}} [[Import files|Import files]] | # Import and scale the underlay.<br/>{{Info}} [[Import files|Import files]] | ||
# | # Insert element ''<IS_TS id=iNameReferencePoint/>''.<br/>{{#ev:youtube|So_4l7ZUirY|900||||rel=0}} <br clear="all"/> | ||
# | # Create ''<IS_TS id=rsPomieszczenie/>'' by tracing<br/>{{#ev:youtube|XmWMZemLoVU|900||||rel=0}}<br/>or by drawing a diagonal.<br/>{{#ev:youtube|D3W8EypT7T8|900||||rel=0}} <br clear="all"/> | ||
===Import | ===Import complete building structure=== | ||
====Import | ====Import complete building structure from InstalSystem 4 (ISB) file==== | ||
{{#ev:youtube|RNVYqZRNe3Q|900||||rel=0}} <br clear="all"/> | {{#ev:youtube|RNVYqZRNe3Q|900||||rel=0}} <br clear="all"/> | ||
=== | ===Verification of the correctness of building structure=== | ||
==== | ====Verification of the correctness of underlays==== | ||
{{#ev:youtube|XKgIXQZ6-6k|900||||rel=0}} <br clear="all"/> | {{#ev:youtube|XKgIXQZ6-6k|900||||rel=0}} <br clear="all"/> | ||
==== | ====Verification of the correctness with ''<IS_TS id=View3D/>''==== | ||
{{#ev:youtube|VCgc07l2bw4|900||||rel=0}} <br clear="all"/> | {{#ev:youtube|VCgc07l2bw4|900||||rel=0}} <br clear="all"/> | ||
<br/>{{Info}} [[ | <br/>{{Info}} [[View navigation in the graphical editor|View navigation in the graphical editor]] | ||
==Dodatkowe informacje== | ==Dodatkowe informacje== | ||
Revision as of 11:38, 26 July 2016
| Product | InstalSystem 5 |
| Type of article | FUNCTIONALITY |
| Source for translation | IS 5.0 Beta 30 |
Description
ARTICLE IS DURING THE CREATION AND EDITION
Location in the program
Storeys management
- Storeys management is available in window General data.
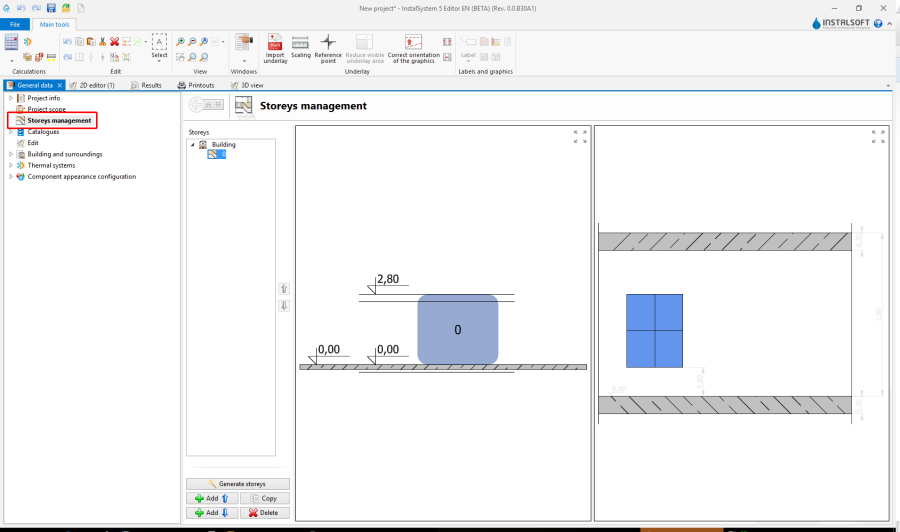
1. Storeys management

Import underlays
- Features and functionality for import underlays are available at the bar Main tools in section Underlay while the range of editing Underlay.
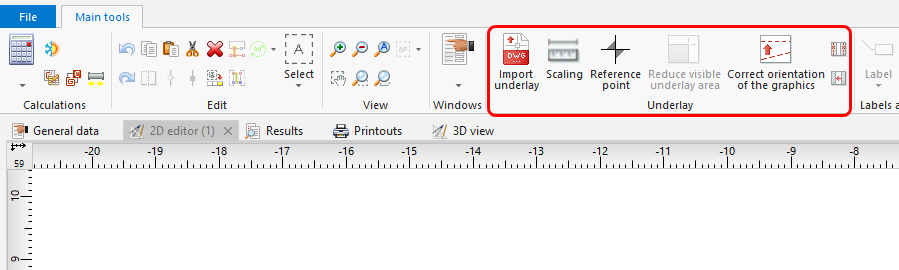
2. Import underlays

Construction
- Features and functionality for building structure are available at the bar Main tools in section Construction while the range of editing Construction.
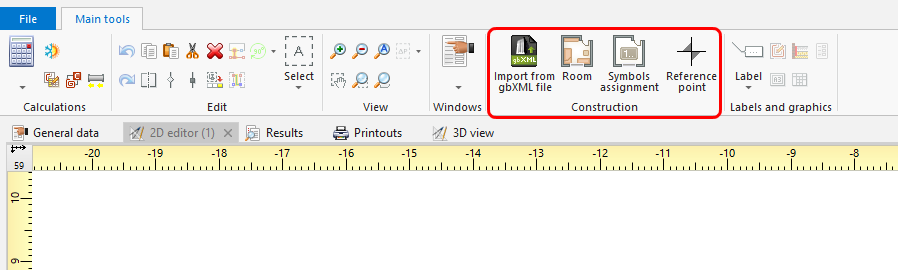
3. Construction

Example of use
Manual structure edit
- Create the required storeys and complete data.
- Import and scale the underlay.
For more information, see: [[{{{link}}}]] Import files - Insert element Reference point.
- Create Room by tracing
or by drawing a diagonal.
Import complete building structure
Import complete building structure from InstalSystem 4 (ISB) file
Verification of the correctness of building structure
Verification of the correctness of underlays
Verification of the correctness with 3D view
For more information, see: [[{{{link}}}]] View navigation in the graphical editor
Dodatkowe informacje
- Wczytanie podkładu z pliku zewnętrznego jest możliwe z formatów:
- Wektorowych:
- DWG,
- DXF.
- Rastrowych:
- BMP,
- JPG,
- PNG,
- GIF.
Szczególnie korzystna jest możliwość importu podkładu w formacie DWG, gdyż podczas późniejszej edycji konstrukcji będzie dostępna opcja przyciągania kursora do elementów zlokalizowanych na wskazanych warstwach podkładu (funkcja snap'owania w trybie AUTO).
W przypadku posiadania wydrukowanych rysunków rzutów można je zeskanować lub sfotografować i tak uzyskany plik zaimportować.
Jeżeli podkład podzielony jest na kilka części (np. w wyniku skanowania) można te części zaimportować osobno i połączyć w programie za pomocą funkcjonalności: Prepare underlay parts to combine i Combine selected underlay files.
For more information, see: [[{{{link}}}]] Sklejanie plików podkładu